

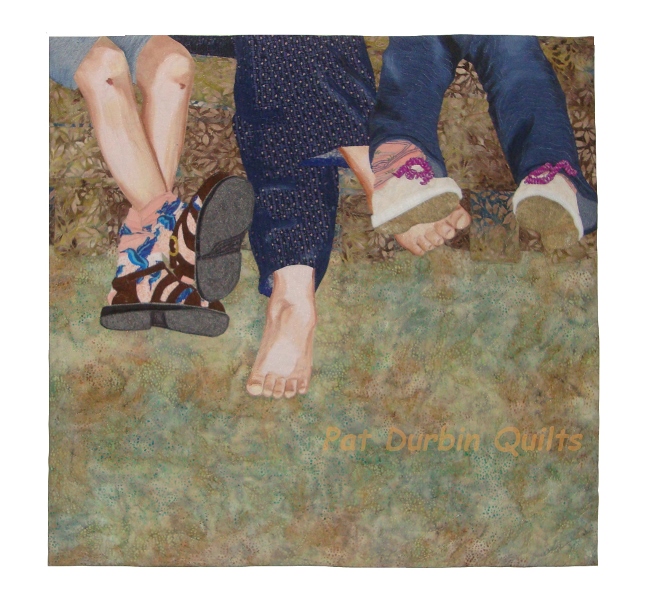
Years ago Gary took the inspiration photo. I looked at it from time to time, and finally decided to make the quilt. - Kind of silly, but fun.
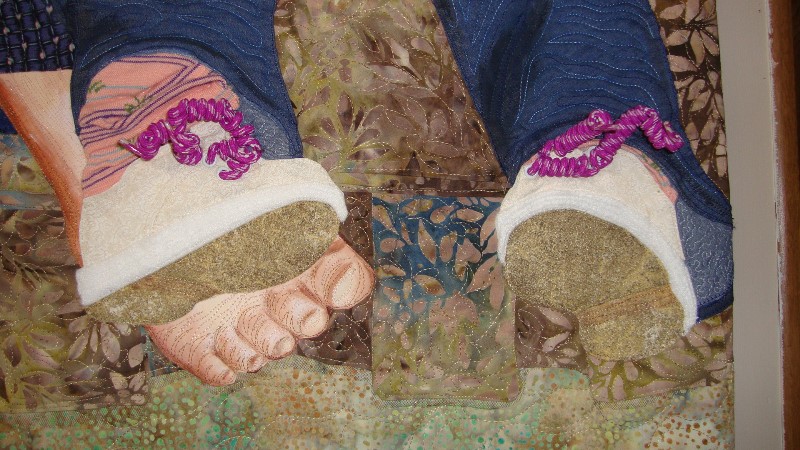
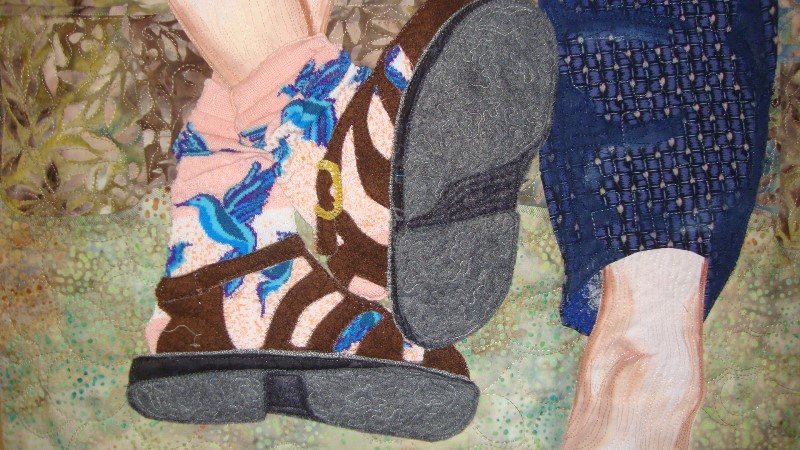
These are Danny's Girls, Chris in the sandals and skinned knees--Amy with the swirly laces. Me with the bare feet.

Happy to report that the American Quilter's Society Daytona Beach registration is now open.
You can see a list of all of my classes if you follow the link...:)

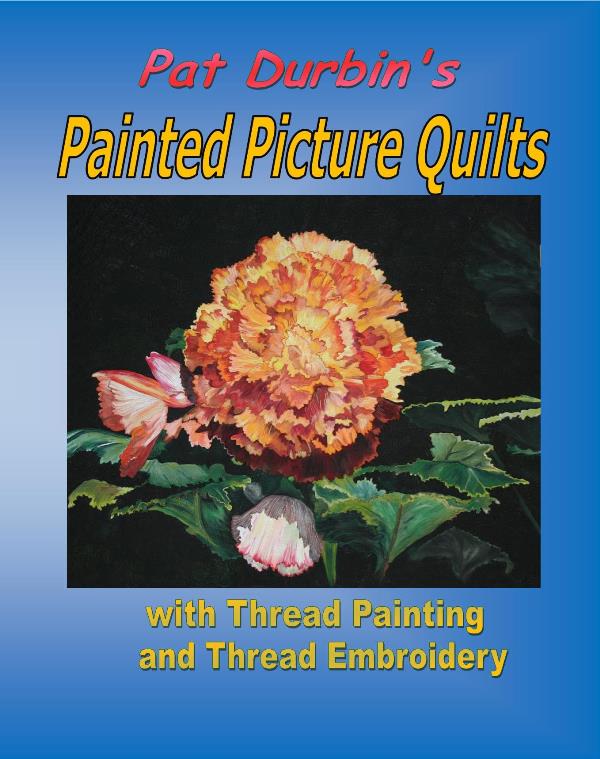
Finally I'm happy to present my new book: "Painted Picture Quilts".

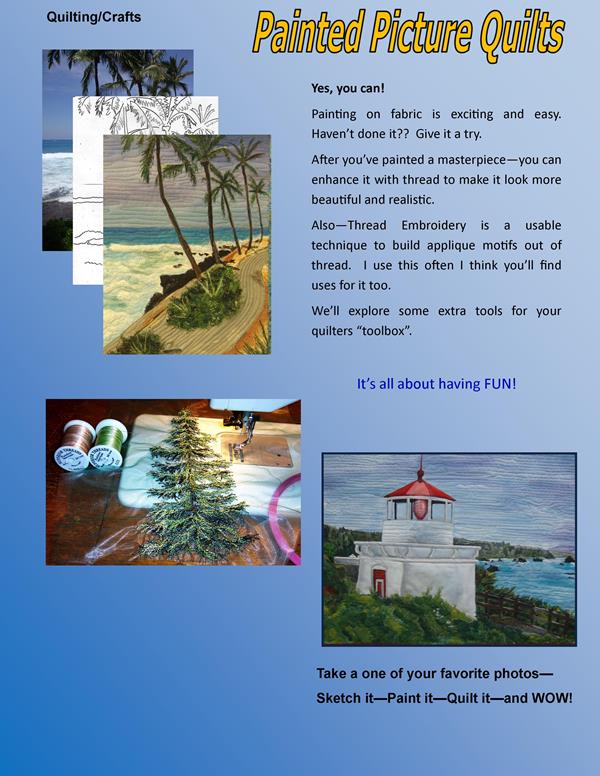
In this new book you'll find projects which you can practice how to paint on fabric and make some lovely small quilts.
You'll also learn how to make "Thread Embroidery" to use as applique for any quilt.
...and Thread Painting for enhancing your work of art..
Lots of techniques, including finishing.
Hope you enjoy it.
Most of you know that I use a lot of thread!! (that's an understatment). I've been privileged to be designated a "Superior Star" from Superior Threads. They have been very helpful to me through the years; giving me a wholesale discount and encouragement every time I get some honor. Thanks Superior.
https://www.superiorthreads.com/superior-stars/pat-durbin
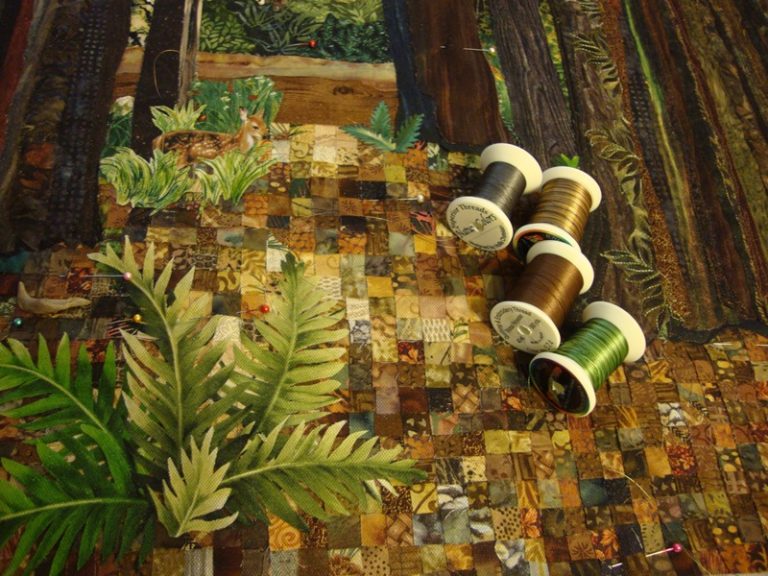
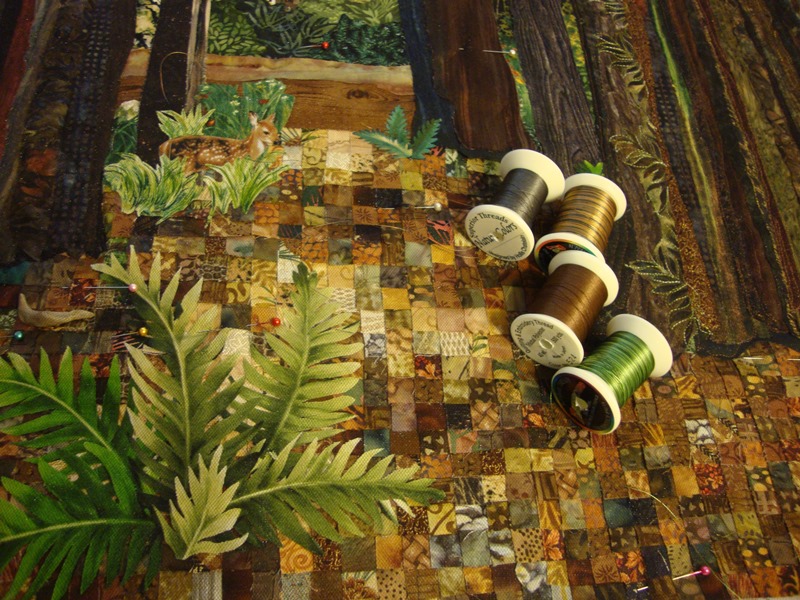
I often lay out the threads I'm thinking about using before I start the quilting process. This is a shot of "Quiet Moment" as I was getting ready to start sewing.
See how the colors blend and highlight the piece. Love them.
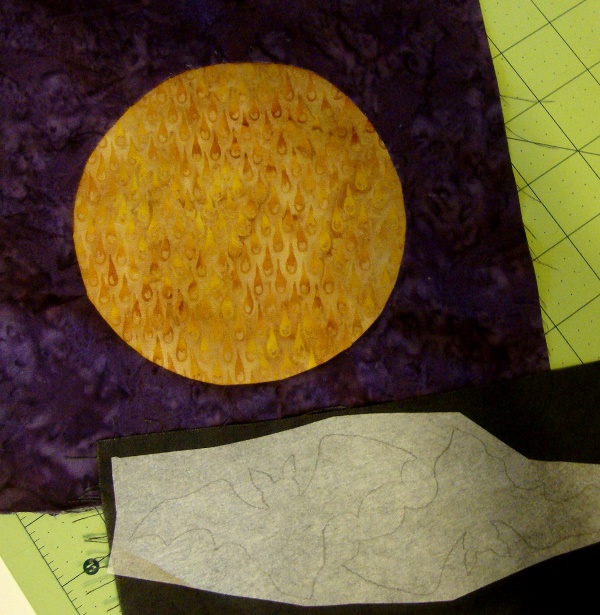
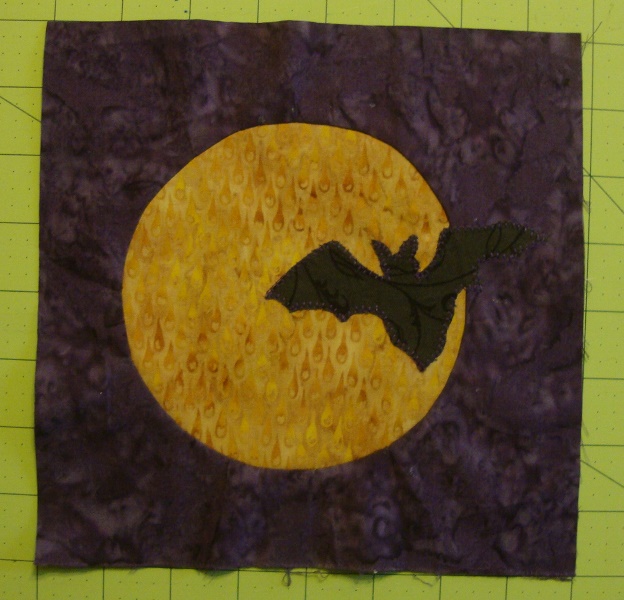
More about the block "Harvest Moon"
Once you have the harvest moon stitched to the midnight background. The fusible applique bat is next.
I like Wonder Under paper backed fusible. (Pellon 805R) You can use what you prefer.
I place the fusible over the pattern and trace the outline with a pencil or permanent pen.
Press (glue side down) over wrong side of bat fabric. 
Cut out bat using your paper scissors. You can arrange the bat wherever you'd like I made one with completely inside the moon and one with him flying over the edge.
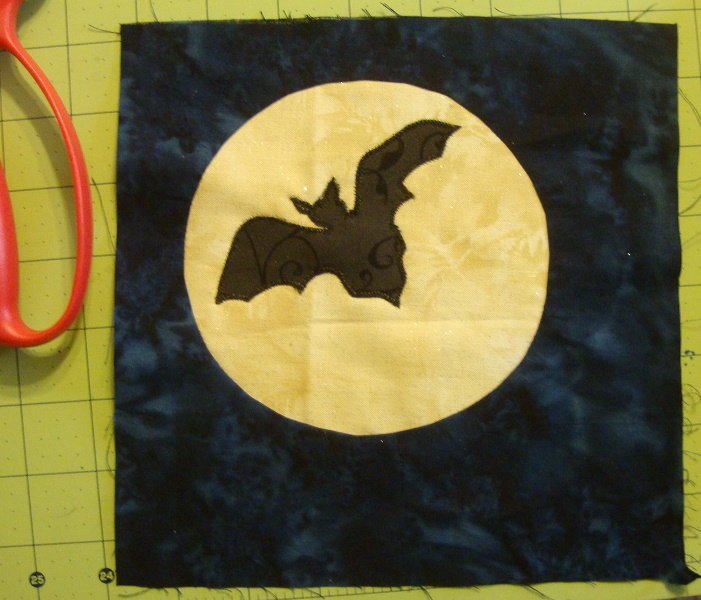
Stitch with narrow zig-zag or blanket stitch. Tip: when the needle goes down to the right it should just fall off the edge of the applique piece. When it swings to the left it should take a bite out of the applique piece. Press the block and enjoy!
Note: If you aren't a member of REQG and would like a copy of the pattern--email me at stitching@suddenlink.net
I have been designing some block of the month patterns for my Redwood Empire Quilter's Guild. The October block uses a freezer paper technique that some aren't too familiar with--so I've decided to show it here.
Following the pattern - you have cut two pieces 8" square of freezer paper.
Place one of those over the 5" circle pattern, paper side up and draw circle with a pencil or permanent pen. It doesn't have to be completely in the center ---place where you would like but be sure that it is at least 1" away from edge.
Then put the second freezer paper behind this one (both waxy sides down) and fuse with iron. (this will make a stiff template to work with)
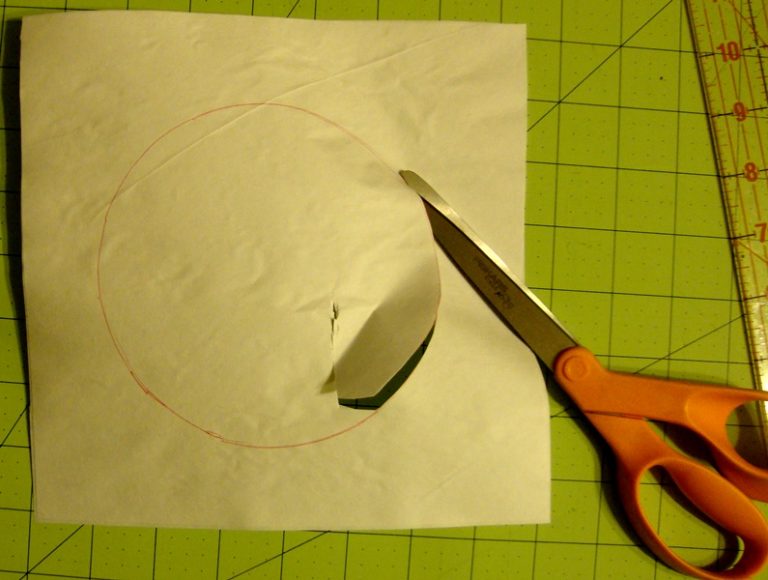
Puncture the inside of the paper circle and then cut with a very smooth line.

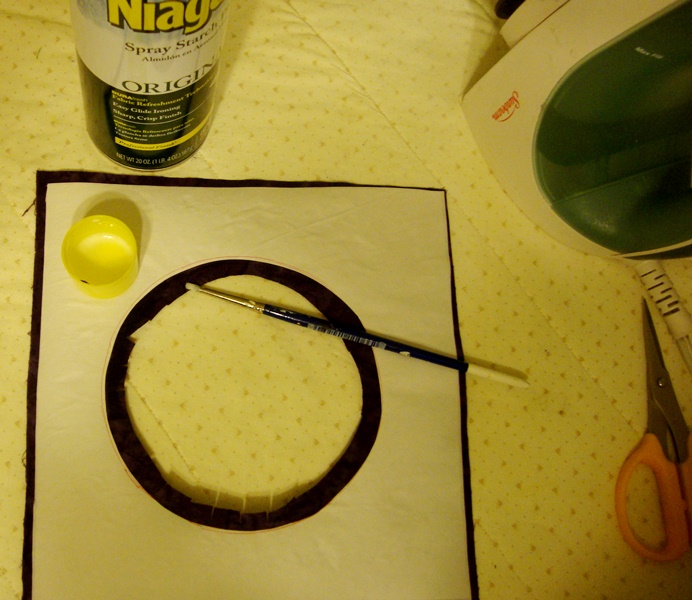
Put background fabric (face down) on ironing board, put template wax side down over it. Press
Trim inside the circle at about 1/2"
Clip seam allowance every 1/2 to 3/4" around circle
Use starch or sizing sprayed into the lid; use a small brush and dampen the fabric around the edge of the circle.
Fold the clipped edge over the freezer paper and press with the tip of your iron (until dry).
Carefully put glue around the fold of the circle seam allowance.
Place the Moon fabric over the glue and press dry.
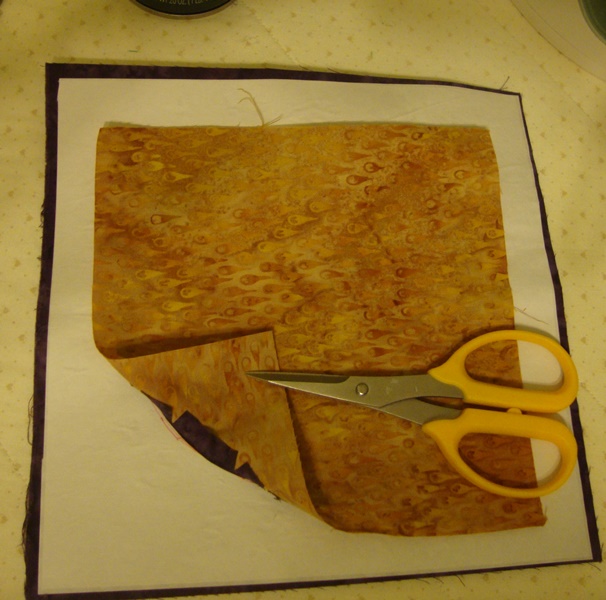
Gently remove the freezer paper template from the background.
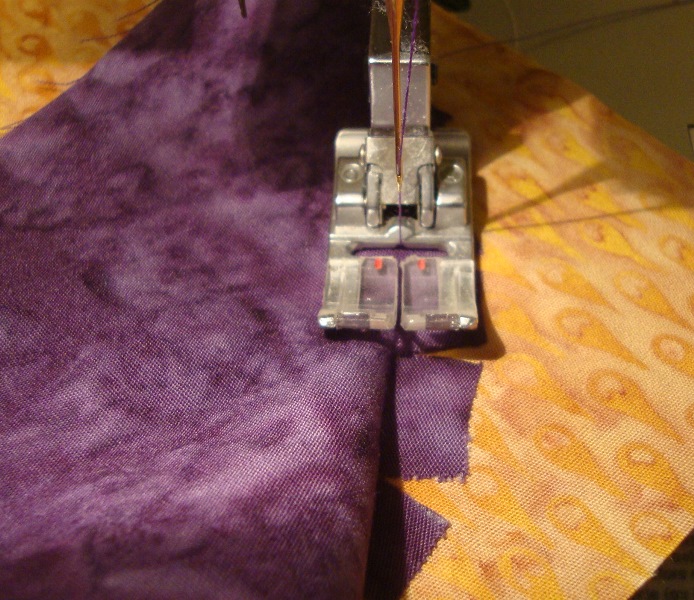
Turn wrong side down, lift the background fabric, and straight stitch in the fold. (as shown). Trim.
If you prefer, you can top stitch from the right side with decorative stitching.
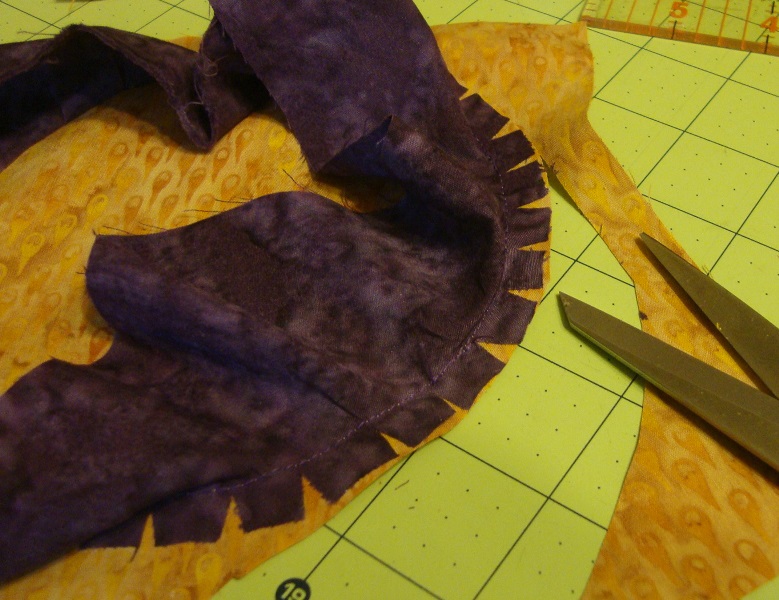
See step two to finish the block.
The link will lead you to the trailer - the whole show is reserved for those who are subscribers to TheQuiltShow.com. The free view has expired--sorry.
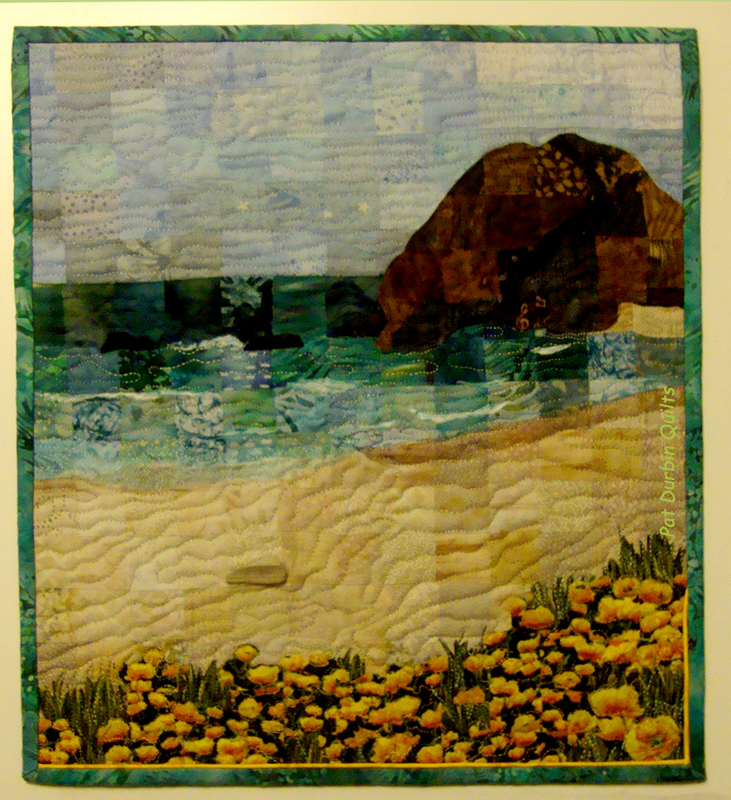
Here's another quilt I used in the demo on TheQuiltShow.com. This one was partially quilted when Alex was learning about Mosaic piecing.
This is the completed quilt. I'm calling it California Beach - because of the California poppies in the foreground.
