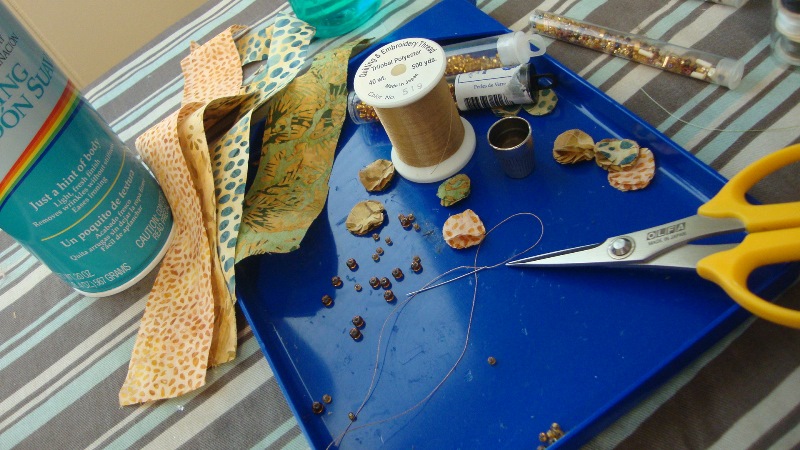
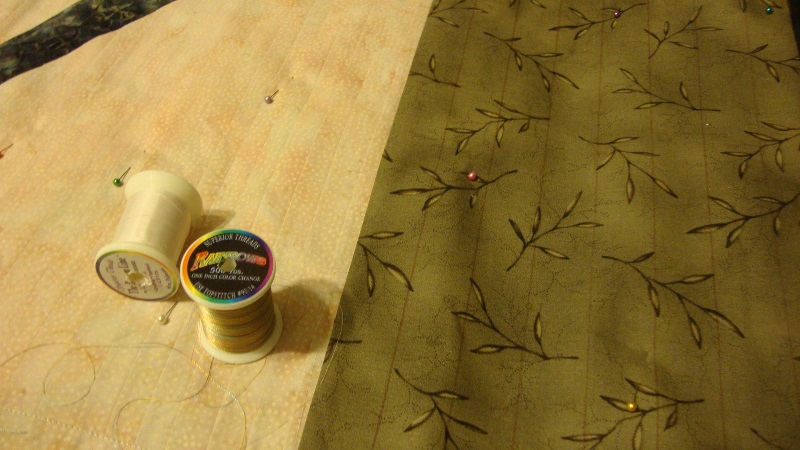
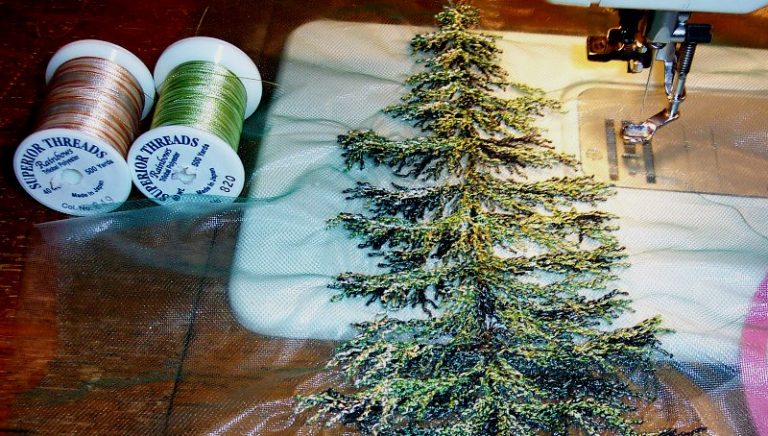
I'm happy to report that Superior Threads has featured me in their blog today. I've been happily sewing with their Rainbows and other Trilobal poly threads since 2005. (that's quite awhile!) I really like these threads because they have a nice shiny look that picks up the light and adds a little "spice" to my pieces. I also use Superior's Bottom line for bobbin thread. So here are a couple of detail shots of some of my threadwork. You can find my methods in my book "Fabric+Paint+ Thread = Fabulous! (you don't have to use paint to learn the thread techniques).
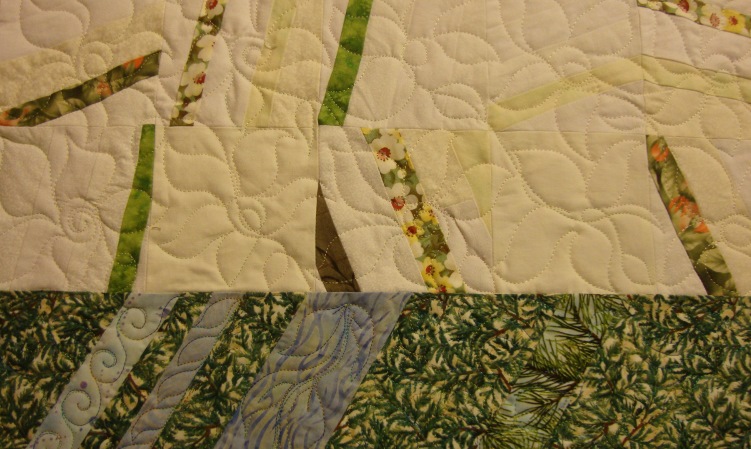
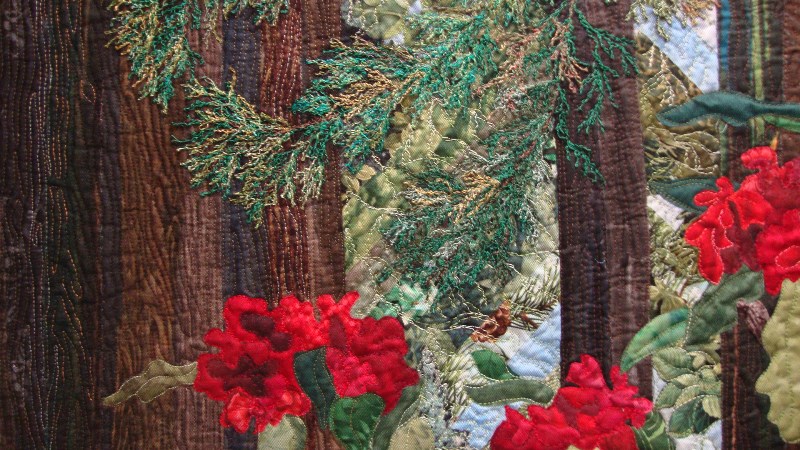
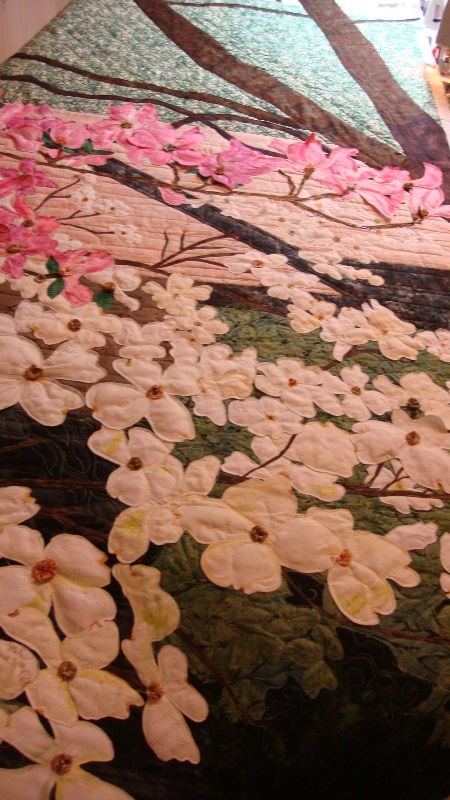
Following is a detail of the Wild Rhosies threadwork.
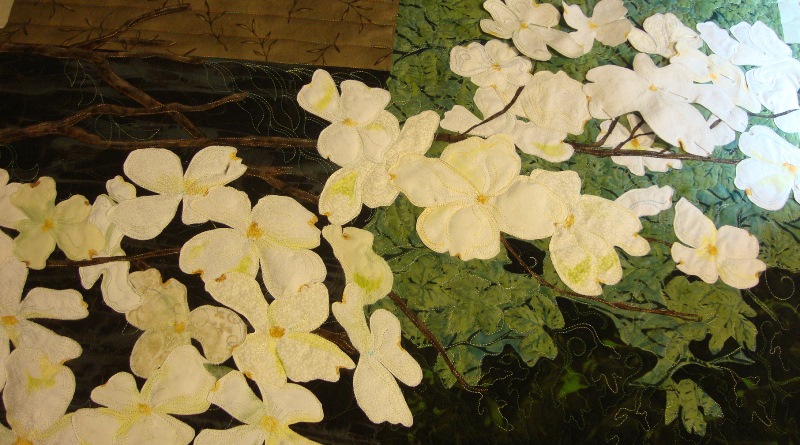
I'm still at it--(slowly). There are so many more flowers to do but I must continue - or I'll never get it done. So--onward! After getting the two ends sewn together I put down the major tree trunks and several large branches.
The smaller branches will be put down as the flowers that grow on them are made. Here are a couple of shots. As you can see there is a long way to go.
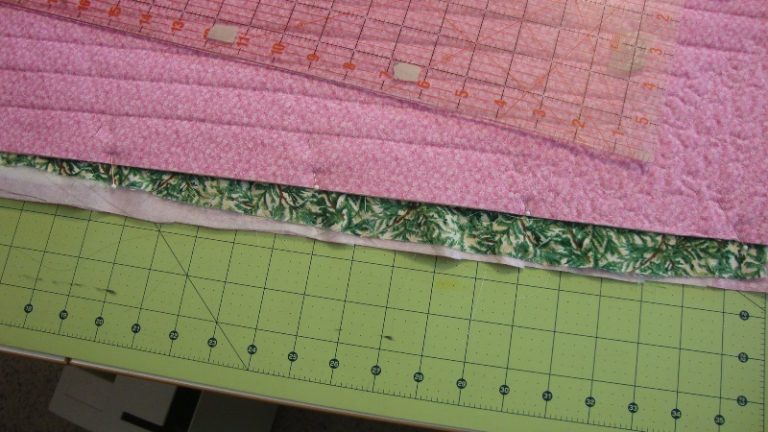
At the end of the flowers on the first half of the quilt, I decided it was time to join the 2 halves. This is because there are a bunch of tree trunks, limbs, etc. It would be harder to join it with all of those pieces needing to match. So...it will make the piece harder to manipulate under the machine, but it was time. First, I squared the top of the lower section and cut it.
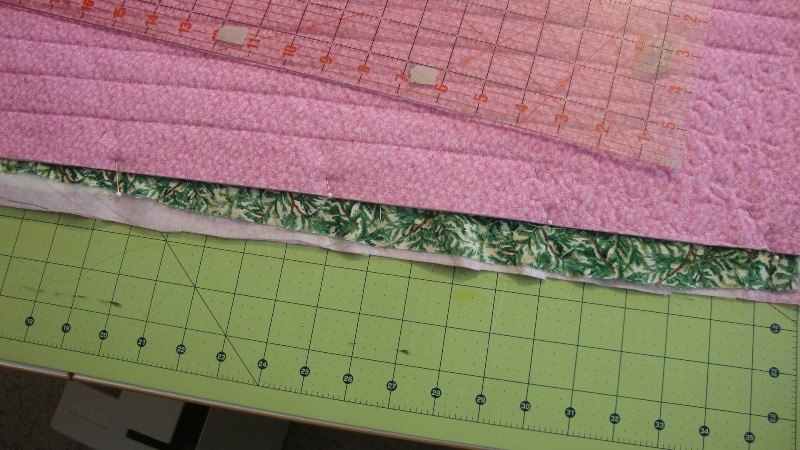
Next, overlapped the cut edge onto the other section and pinned. Then, trimmed the other section longer (1 1/4" longer). I sewed the seam at about 1/2" seam allowance on the short side.
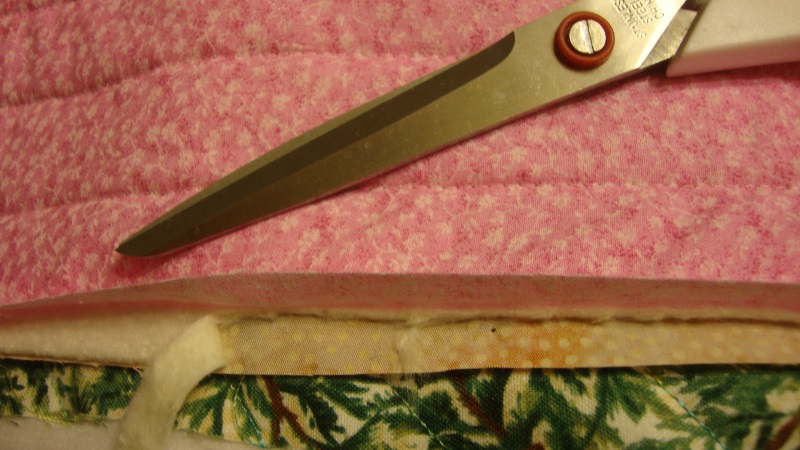
I was able to separate the 3 layers and trim away the batting from that section. Then pressed the seam.
Then took the long side of the seam allowance and folded it back under itself and pinned. Hand stitching is necessary to finish that folded edge. Next I'll start adding trunks and limbs and flowers over....(more flowers!!)
Oh, so many flowers! -who was it that decided to make this tree? So I've almost reached the half way mark and there are a few pink flowers before I get there.
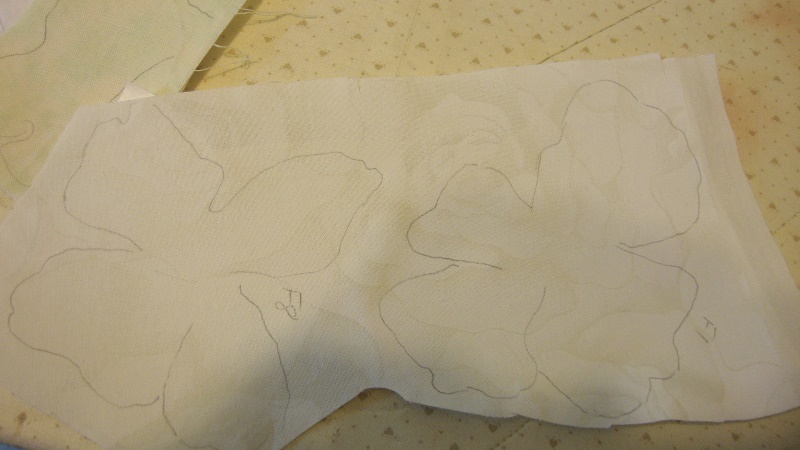
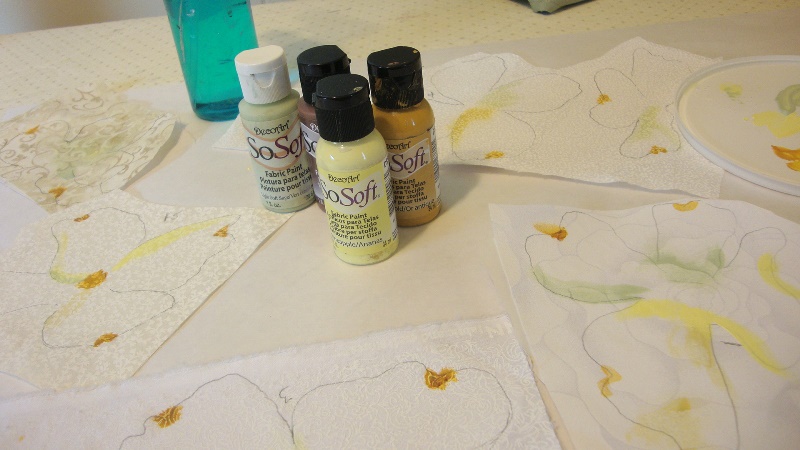
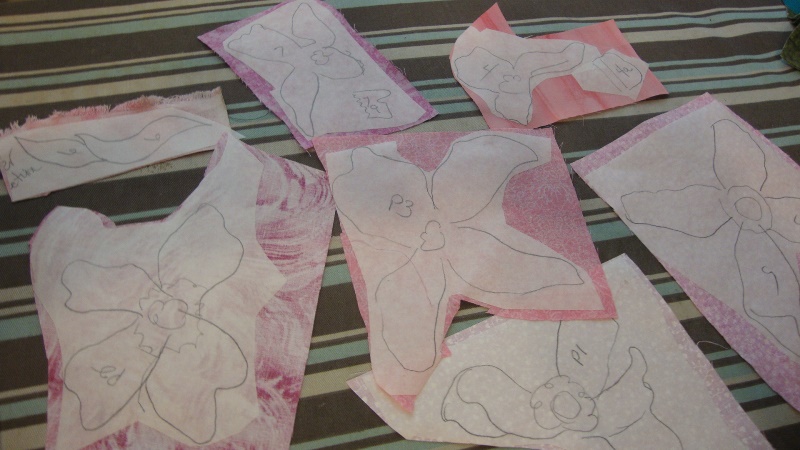
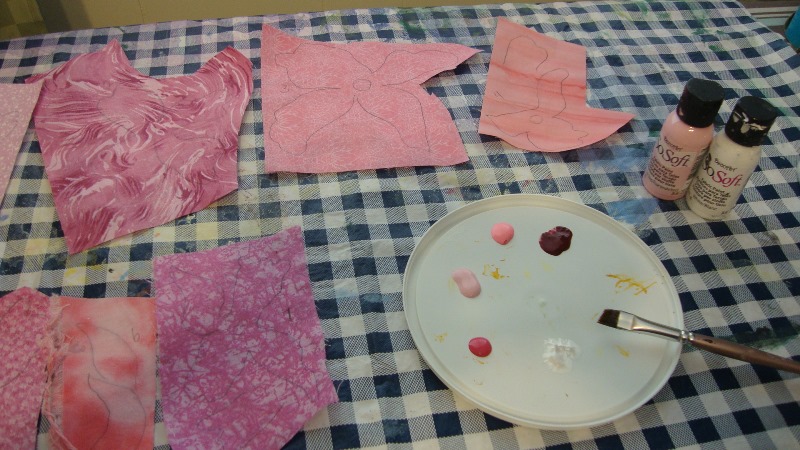
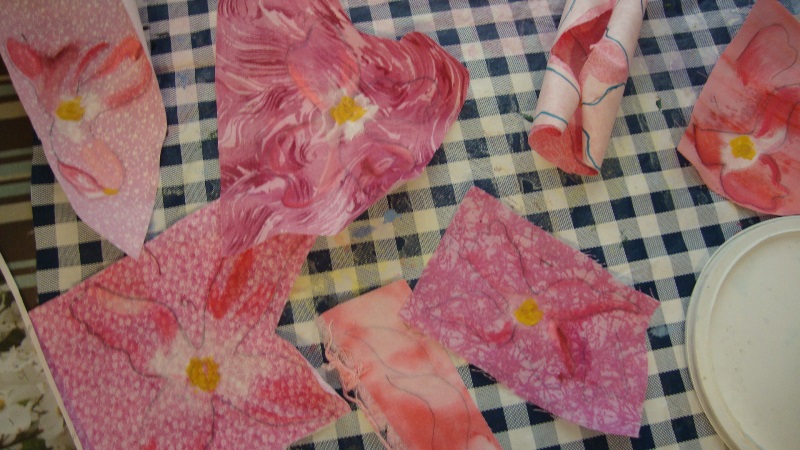
So I traced the reversed outline on fusible, pressed it to different prints, then decided to enhance with some paints.
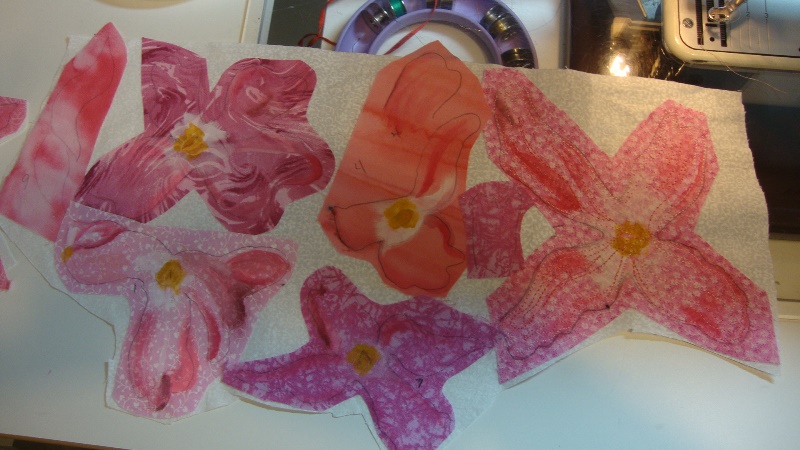
I still need the double layer even though it isn't needed for a shadow barrier, I want to do stitching on them and need this as a stabilizer before I cut them out and sew to the quilt.
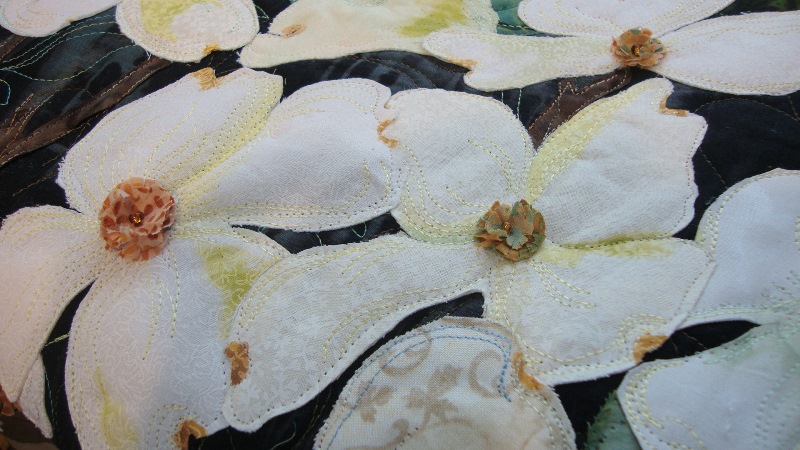
Next I did sew them down - notice some have loose edges here and there. Then back to centers again.
I did discover that I can do a little zig-zag to attach the centers then add the beads. Whew.
I've tried a couple of methods and this is the one I think I'll stick with. I finally decided against the yoyos, though I spent some time making them. The change seems good to my eye. What I am doing now is cutting 3 layers of batiks in the color family I desire. Sometimes all three layers are of 1 fabric and sometimes I mix it up. Then I cut into the edges, pie style, leaving an uncut center section where I attach a bead and sew it to the quilt top. After I have several sewn on I put a bit of sizing on my fingers and ruffle up the edges by pinching them. When it dries it stays fluffed up pretty well.
I stitch them over the centers of the flowers and vary the sizes and the beads just to mix it up a bit. This is a slow process. I'm still making flowers and now centers. I'm approaching the halfway mark, but that's probably wishful thinking. Got to keep going.....
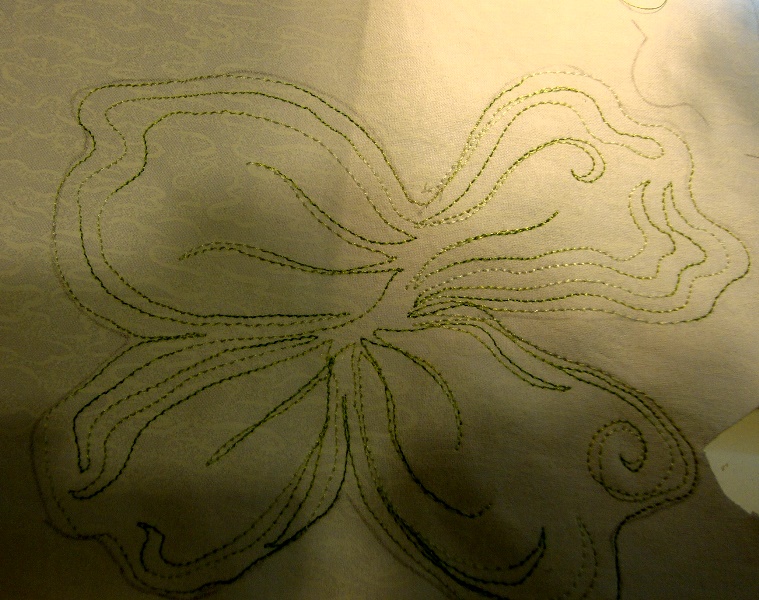
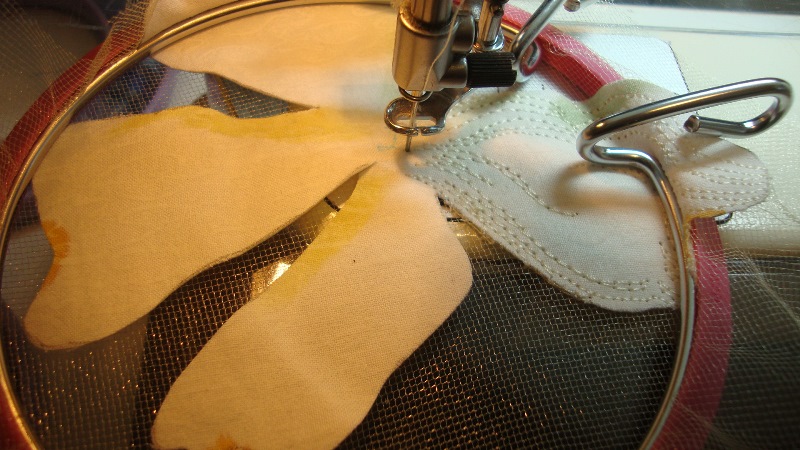
Well it goes on and on I'm making progress, however it's going to take some time. I think I have about 1/3 of the basic flowers made. I've been stitching with light colored threads to enhance the flower shapes and make sure the two layers don't separate. Here's an example, after stitching I trim and attach.
and here's a portion for the top. After this, I'm experimenting with the flower centers.
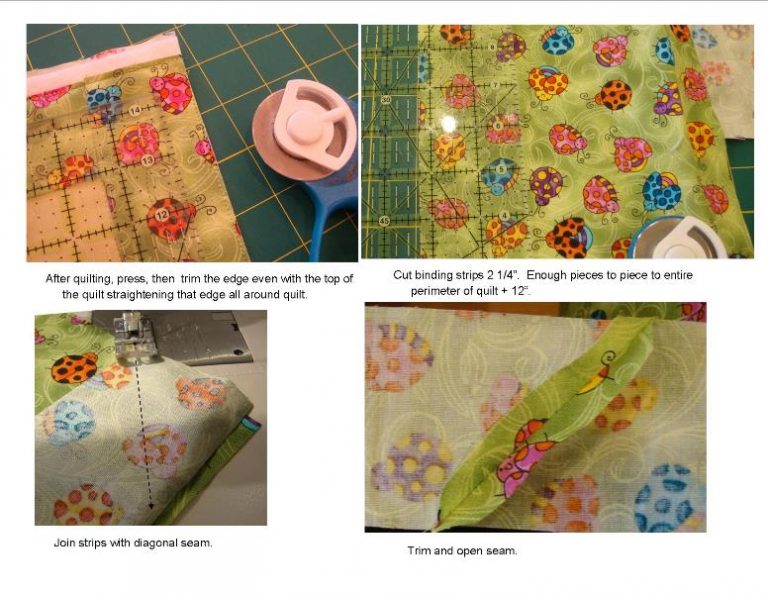
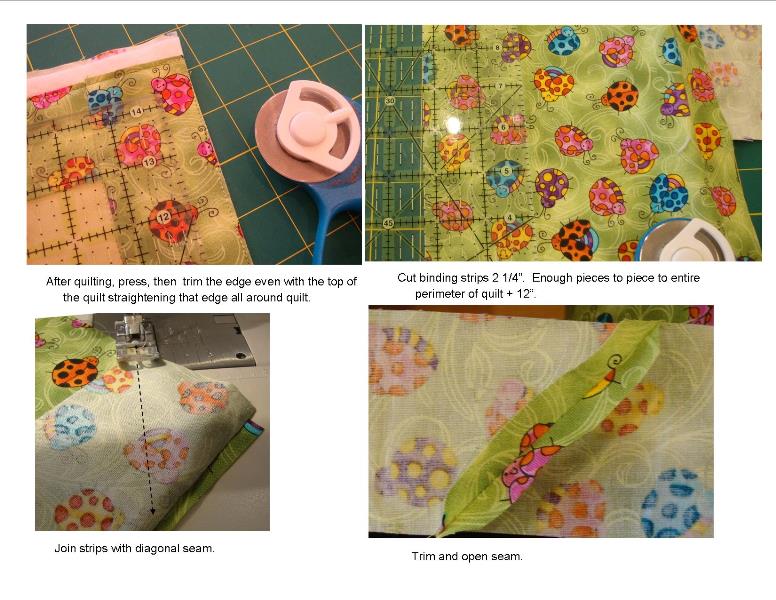
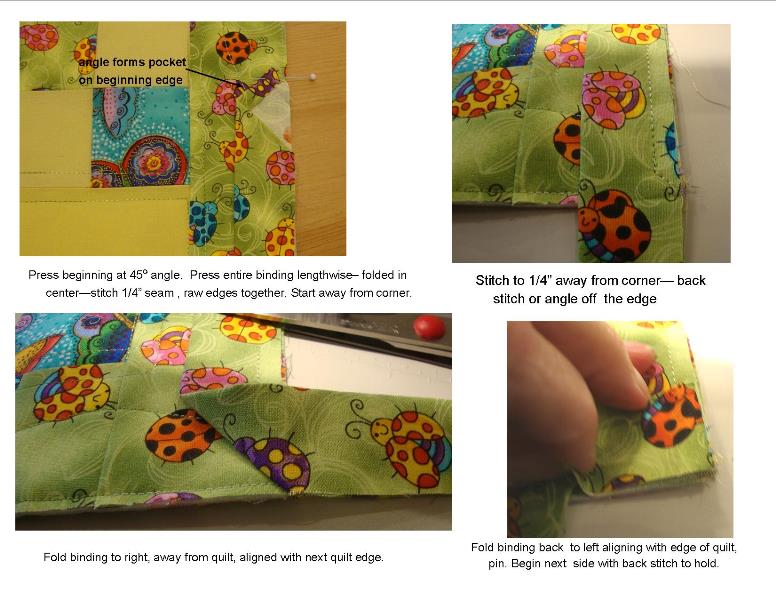
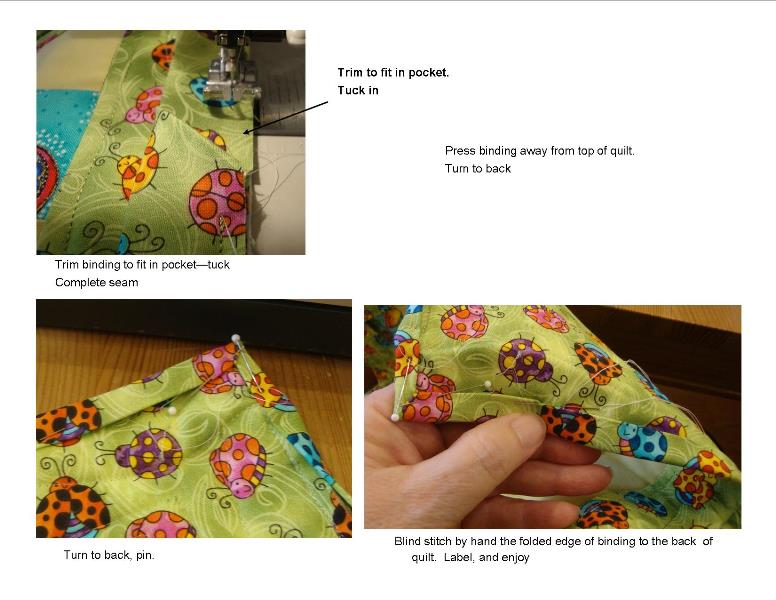
I recently taught a class where there wasn't time to finish the binding. I decided to post a general tutorial about binding. This uses a simple joining that is appropriate for small quilts. There are fancier ways to join if you're doing a show quilt. This is just easy :)
Repeat for each corner, when you approach the final edge....
Well, the quilting is complete and I've begun the process of making flowers. I've been afraid to count them but I think there are hundreds! So I'm beginning with several "white on white" fabrics. I like to have variety so they'll look like individual blooms. Because the backgound is dark in several places, I am fusing a second layer of white fabric behind as a shadow guard. This first try, which I think might work is shown as follows.
I used the enlarged tracing to make patterns for the individual blooms--I'm doing one little section at a time to keep from getting overwhelmed. I then did some minimal paint to help define the flower.
Next I tried two different methods of stitching...I think the second worked fine and is a bit easier. Eventually I plan to make some kind of fancy center...but that's a ways off.
I probably will be at this stage for weeks (who knows) until I have enough flowers.
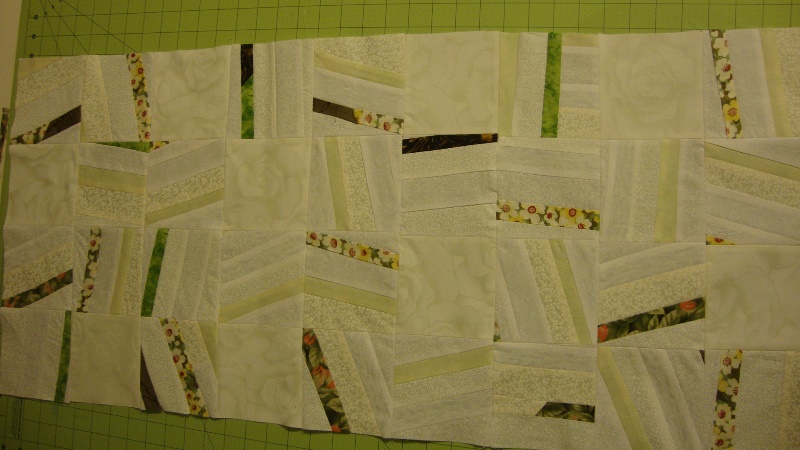
Just so you know...I often have ideas about how to construct a quilt that may or may not be a help to me. This particular quilt is quite long and narrow. I decided to do some preliminary quilting on it to stabalize the piece and prevent a big quilting project when it is finished. This is an unusual choice for me. But since I've been sharing the project I'll let you see this too. Why did I choose to do this?
Large pieces are getting harder and harder for me to quilt. It's a physical challenge.
This quilting will be mostly covered with the considerable overlay of applique.
I'm working toward a specific size; I want most of the shrinkage to happen before the applique is applied
The opportunity to divide the quilt at this point is available, making the whole project way easier to quilt.
Will I be sorry for this choice? That remains to be seen. I hope that when I put the 2 pieces together I can join them well...hmmm.
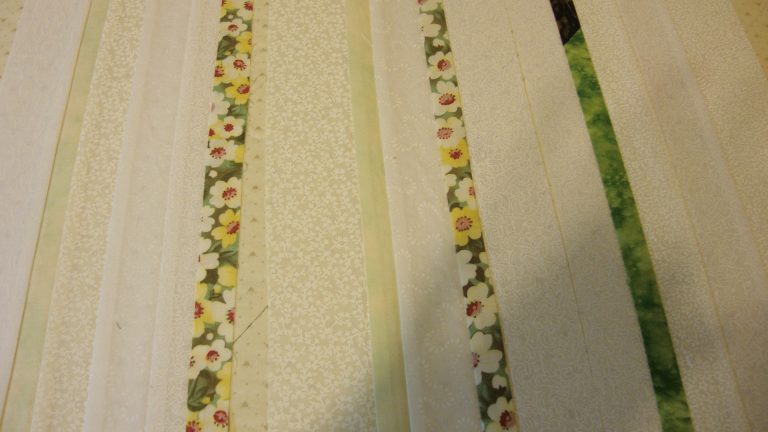
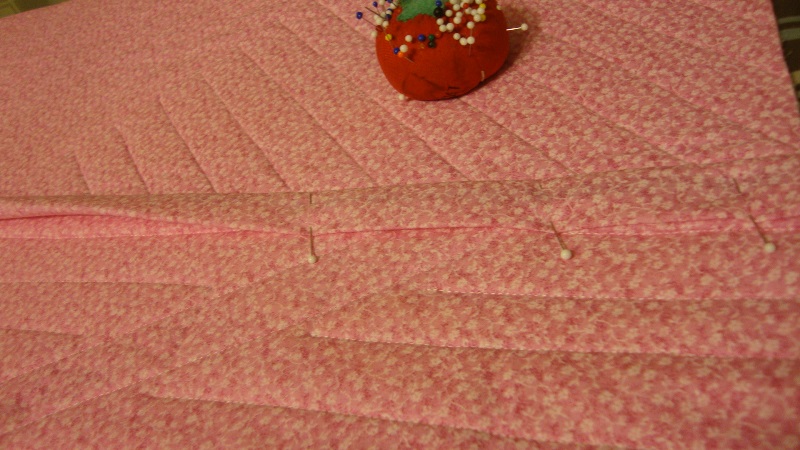
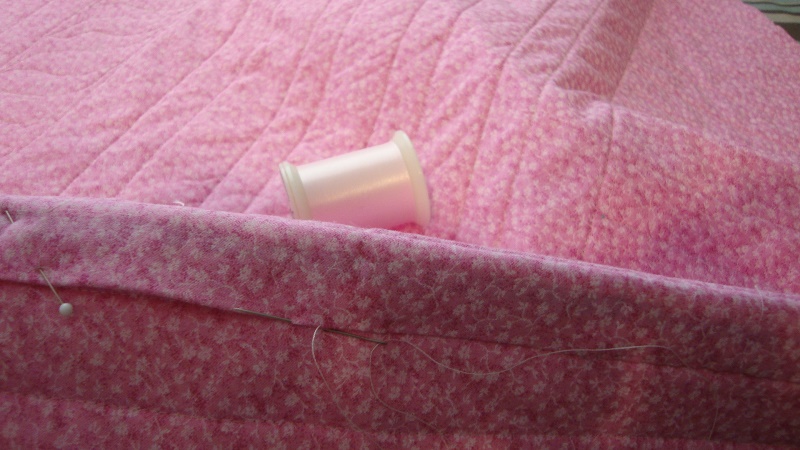
Quilting as of now - remember, it should get better as we go. Here are a couple of shots of how I'm doing it.
First, I'm using large head pins to baste at about 6" intervals. Since this leafy section is mostly to be covered, I'm not doing much detail and decided on lines as a quilting choice...masking tape helps to have a line to follow. Sometimes it gets in the way.
The house section will be quilted with this Superior Rainbows color and of course Bottom line for bobbin thread.
The flowery background is quilted with an easy flower design, which I hope will peek out here and there and look like some dogwood pedals.


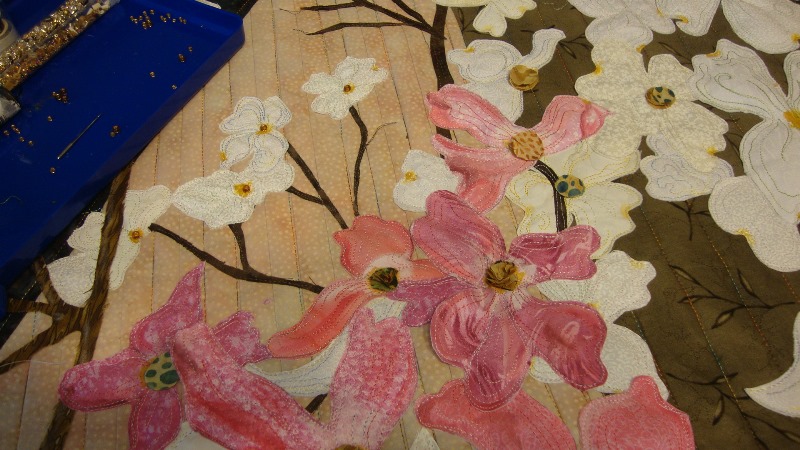 I did discover that I can do a little zig-zag to attach the centers then add the beads. Whew.